Searching for deck stain? Consider ARBORCOAT
If you have a wood deck that you are planning on staining, you may want to think about using Benjamin Moore’s ARBORCOAT exterior stain. While there are many deck stains on the market there is nothing quite like ARBORCOAT. This stain is a water-borne acrylic based product, and comes in a two-component set. This means that two coats are required: one coat of stain, and one coat of finish. The first coat provides the actual stain while the second coat seals in the stain and protects it from graying, mold and mildew, and weathering.
ARBORCOAT deck stain is especially good at repelling mold, mildew, and algae, due to its use of zinc oxide. Another signature feature is its resistance to graying. This stain really keeps its color for years, and is great to us if you have experienced graying in the past. Since it is acrylic-based, the end result may have a bit of a “plastic” look, so be aware of that before beginning.
Gather The Right Materials
Before starting out, we recommend that you make sure that you have all the tools and materials you are going to need. Whether to use paint brushes or rollers really depends on the size of your deck and personal preference, but we would recommend using rollers for large areas and brushes for cutting-in on edges and railings.
Another tip is to purchase some Benjamin Moore paint extender and mix it in with the coating. This will keep the stain wet a bit longer, and keep it from showing lines when it dries. For ARBORCOAT stain this is especially important, and you may end up with lap lines if you do not use it. Obviously the speed at which the stain will dry is dependent on the weather and humidity, so you are going to see faster dry times on a hot dry day than a cold humid one.
Preparing Your Deck For Staining
You’ll want to make sure that your deck has aged for at least 12 months before staining. Some people think cedar decks can be stained right away, but we recommend always allowing your wood to thoroughly dry out.
Starting out with the prep-work, you will want to make sure that bare wood is exposed. If there is a pre-existing coat of stain on the wood, you will need to remove it with a combination of stripping, sanding, and power-washing. We would recommend using a high-PSI power washer to wash dirt and grime off first, careful not to damage the wood. Start out the sanding process with a coarse grit sandpaper to remove the large imperfections, then switch to a finer grit to really smooth it out.
An improperly prepared deck may not allow the stain to stick to it or penetrate at all. This means that you will quickly see the stain start to peel and crack. Taking the time to prepare the wood greatly increases the chances of the stain penetrating and leaving a lasting impression on the wood.
Apply the stain smoothly and evenly
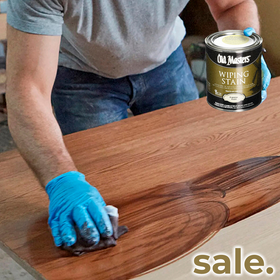
Once the wood is ready, you can start applying the deck stain. Apply it smoothly and evenly. Remember that any imperfections will quickly show up once the stain dries. Make sure that it is applied totally evenly. For large flat surfaces, use a roller for quick applications. Also be aware that the stain will start to dry quickly after being applied, so don’t lollygag once you have started.
After the stain is applied in a smooth, even coating, you can apply the final protective clear coat. This should be applied just like the stain was, smoothly, evenly, and quickly. Allow time for the clear coat to finish. Once again, any imperfections will be more visible once the coating dries. Furthermore, imperfections in the protective coating can create weak spots in the defense of your deck, allowing a spot for peeling to start, or for mold to start growing.
For further information be sure to take a look at this video Benjamin Moore put together:
If you have any questions about ARBORCOAT deck stain, or need advice on your deck staining project feel free to contact us.


