How To Use Epoxy Garage Floor Coating
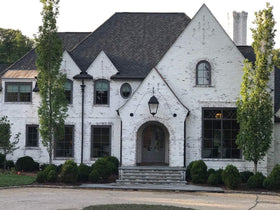
Concrete is a deceptive material. It’s true. Starting out as a liquid, we expect the final product to be a strong as the rocks and sand that go into it. But concrete, just like everything else, does not last forever. If that were true, we’d never have to wake up to crews replacing sidewalks at seven in the morning. Even though concrete does wear and decay, it doesn’t mean we can’t help it last longer and look great. And that’s where proper concrete maintenance comes in.
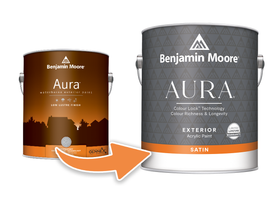
Regularly washing concrete is a great first step to keep it looking pristine, but the best way to make your garage floor look it’s best is with an epoxy coating. This specialized coating goes on clear but quickly dries into something that can resist oil stains, beads water, and makes your garage floor much easier to clean. It’s available at most Toronto paint stores and comes in a variety of forms to fit your needs. With most garages, your epoxy coating should be durable and able to resist small chemical spills, just in case your car starts to leak.
Applying epoxy coating, just like when you’re painting, is all about preparation. You’ll need to prepare a surface that epoxy likes to bond with. Ideally, the surface should be slightly rough, not smooth, to enhance the bonding process and prevent peeling or flaking in the future. Once you’ve settled on the epoxy you’ll be using, you’ll need to prepare the area properly, which can be labour intensive. Remember though, your concrete floor should be older than 60 days before applying an epoxy as it takes a couple of months for concrete to fully set.
Clean Your Concrete
Cleaning your concrete floor is the first step. Make sure you sweep off all debris thoroughly, use an old paintbrush to sweep out corners and hard to get places that you broom cant reach. This can take a lot of time, but don’t be scared to get on your hands and knees to give your floor the best clean possible.
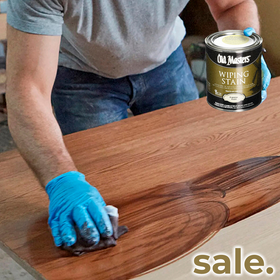
Sand Old Paint
If your floor has been painted before you’ll want to give it a quick scuff sand to remove any glossy finish the floor once had. Clean up the dust using a broom or vacuum, then using a hard-bristle brush, scrub down the floor using an all-purpose cleaner. Rinse the floor with a garden hose or power-washer and let it completely dry before moving on to the next step (typically 6-8 hours, but largely depends on your climate and specific circumstances).
Patch Holes And Cracks
Start out by sealing any cracks and fixing any potholes that may be present in the flooring. You’ll want to do this step before the etching process to ensure that the patches are treated in a similar fashion as the flooring. Make sure your patches are completely dried according to the patch material specifications before moving onto the etching process.
Etch The Concrete
After you’ve cleaned your floor you’ll need to etch it. Etching is a way to create pours in the otherwise hard, smooth concrete surface. Making the surface slightly porous allows the epoxy to develop a very strong bond with the concrete creating a durable and long-lasting surface.
Before you begin etching make sure you have the right equipment. Most concrete etching solutions are basically just hydrochloric acid, so wear appropriate safety gear.
Make sure you have the following before etching your concrete:
- Concrete etch
- Safety equipment (safety glasses, rubber boots, chemically-resistant protective gloves)
- Stiff-bristled push broom
- Watering can or bucket (to apply the etch)
Follow the manufacturer’s directions on how to properly prepare the etching solution, typically you’ll need to mix it with water. Start working on the floor section farthest from the exit. Apply the etch in small sections and scrub the floor vigorously with the stiff-bristled broom back and forth and from side to side. Once you’ve etched the entire floor, hose it down with a garden hose starting from the area you began the etching process. Allow the floor to dry completely before epoxying the floor, again this may take 6-8 hours, but can depend on your local weather and flooring location. Waiting for your floor to completely dry is the best way to get excellent results and thus is the best value for your money.
Applying The Epoxy To Your Floor
The actual epoxy application process is wonderfully easy. If you’re dealing with areas of exterior concrete, pick a sunny day where rain won’t interfere with your work and plan out where you’re epoxying ahead of time.
Make certain you’ve taken all safety precautions when dealing with epoxy, if you’re working in an interior space you’ll want to use proper respirator protection (not a “dust mask”) in addition to gloves, boots, and safety glasses. Refer to safety data on the labeling provided by the manufacturer and strongly adhere to these directions, to be absolute certain you should refer to the MSDS. If you have any doubt regarding your ability to execute this project, seek the assistance of a professional contractor.
When working with epoxy, most of the gear that gets messy should be disposed according to your local municipalities by-laws, as cleaning requires the use of highly-flammable solvents. To epoxy your garage floor you’ll need:
- Concrete epoxy
- A roller on a pole
- Paint tray
- Paint brush
- 5 gallon bucket
- Electric drill & drill mixer (e.g. spiral mixer) for mixing two-part epoxies
- Safety gear (glasses, gloves, boots, respirator)
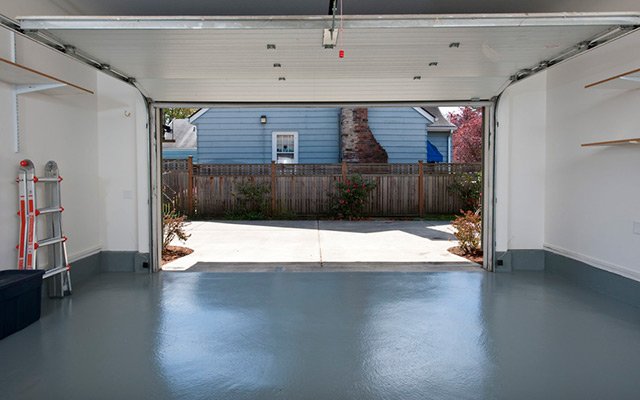
Mix up your epoxy according to manufacturers instructions in the bucket using the drill and spiral mixer, pour some in the paint ray, grab your roller, and start applying it to the floor. Work from the far-end of the area towards your exit location, consider this ahead of time. Work in small areas, use the brush for edging and places your roll cannot reach. Most epoxies will begin setting as soon as you’ve mixed the two parts, so you need to work quickly. You’ll only have about two hours per mixed batch, which should be plenty of time if you’ve prepared appropriately. Once it’s all applied, let it dry for three full days. After that, feel free to move everything back in and enjoy your newly coated floor.
Epoxy coatings are one of the best ways to keep your garage floor clean and looking its best while extending its lifespan. As with painting, epoxy is all about the prep, so make sure to do your best to prepare the area and you’ll have an epoxied garage floor that will last for years.